Part 1: Arranging Cues
River Oaks Church - Updated June 2025
Goals / Scope
The first step of programming lights is to lay out the cuelist. The cue list is the order of cues that will be followed during a service. There is typically a cuelist for English and Spanish each week. Special events sometimes are split up song-by-song for easier flexibility on the fly, but it's usually safe to plan on a single cuelist per event.
In part 1, we will walk through the initial cuelist creation, and some basic tasks relating to cuelists.
Cuelist Creation
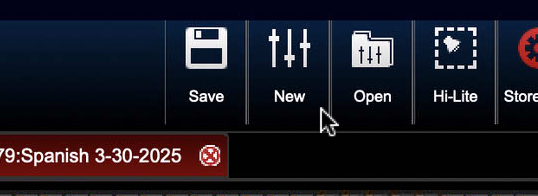
To create a cuelist, click the New button in the top middle area of the screen.
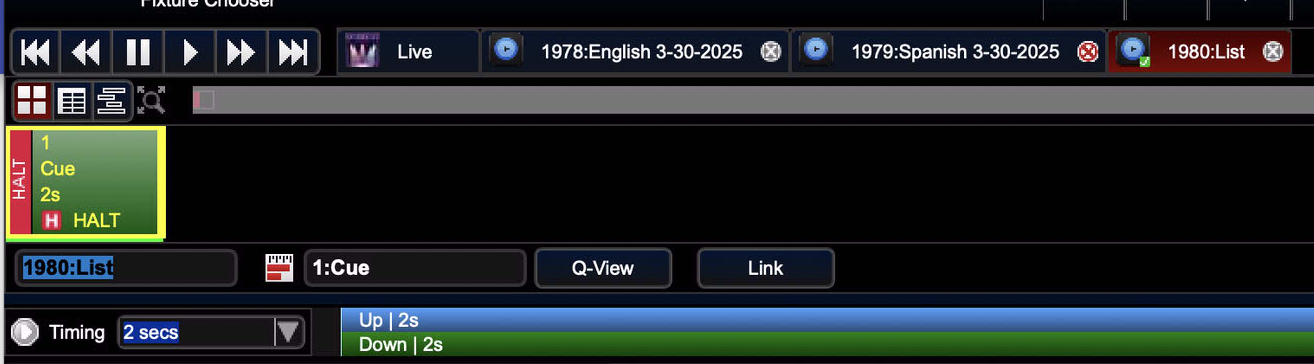
After you do that, you will notice a few things happen:
- The cues from the previously active cuelist disappear, since the new cuelist is selected
- The new cuelist does not have a name
- It provides you with an empty cue to begin.
Let's fix the name of the cuelist first.
Cuelist Name
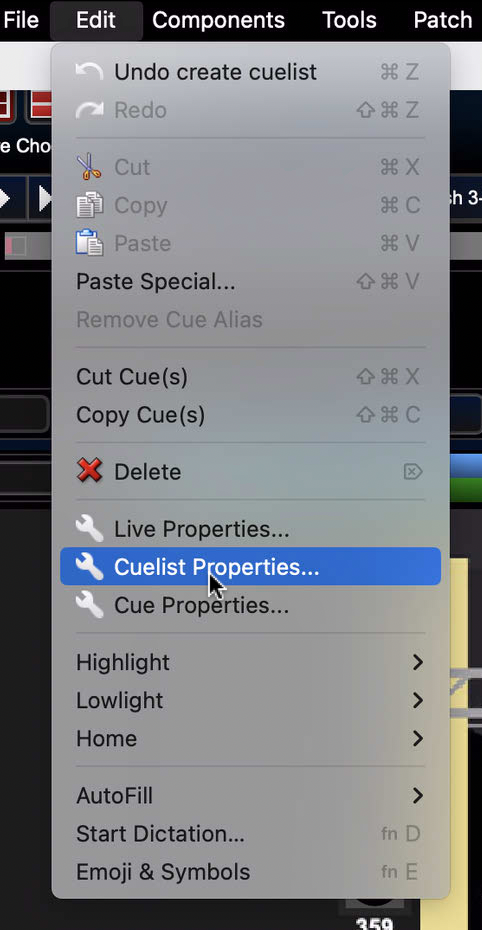
With the cuelist still selected, move your mouse to the top of the screen. Go to Edit > Cuelist Properties
You'll see the option to edit the name at the very top of the new window that appeared. To change the name, simply click in the text box and type in the new name. The general format used for naming is:
LANGUAGE M-DD-YYYY
For special events, I replace LANGUAGE with a brief name of the event. Ex. Christmas, Baptism, etc.
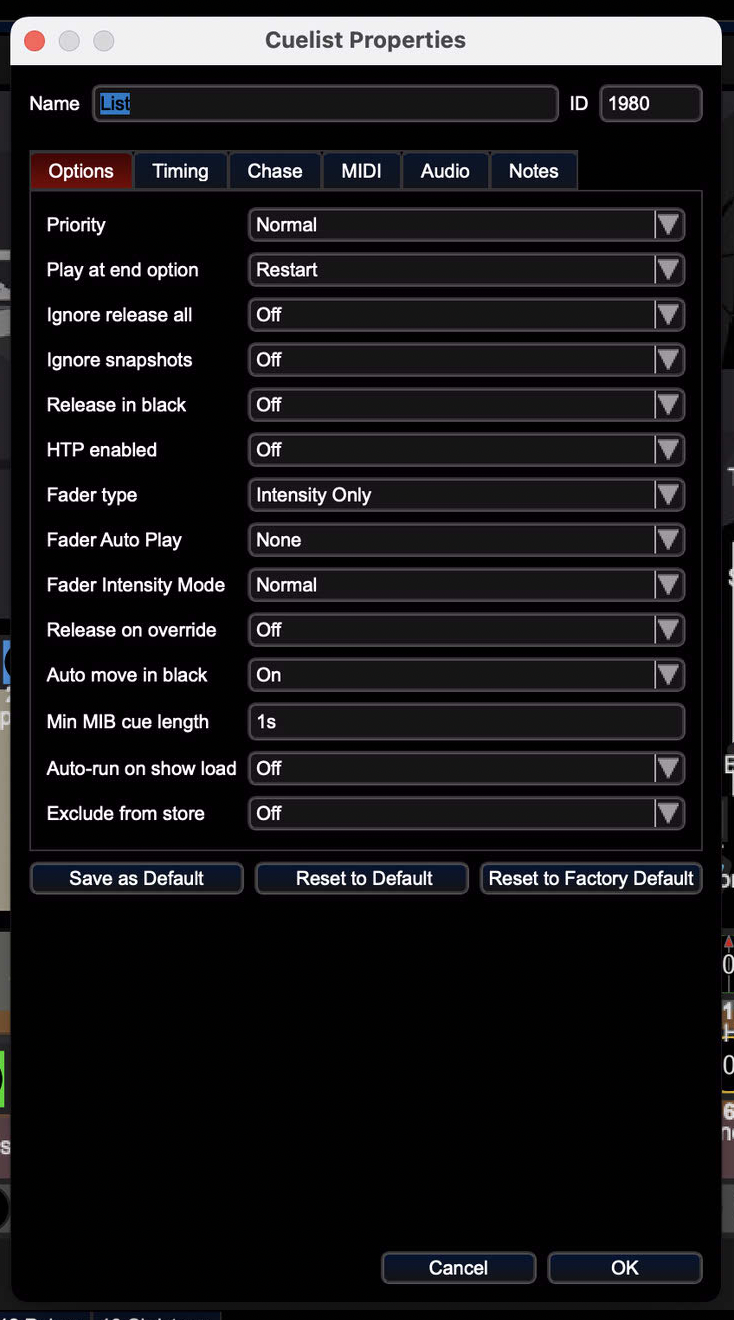
Once you type in the name, click Ok in the bottom right of the window. That will save your changes.
Adding Cues
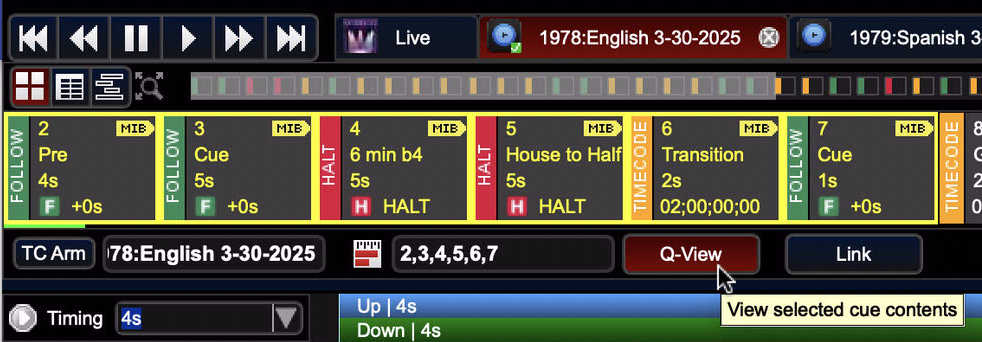
There are a few ways to add cues, you can click the + icon in the top right area to add a blank cue, or you can steal the cues from the previous week. Typically, in the mindset of consistency, I like to copy the previous week's first few cues. That pretty much ends up being Pre service all the way through the transition cue. To do this, go to the previous week's cuelist in the top (that should still be open), and select Q-View, and then click the first cue you want, and hold down SHIFT, and select the last cue you want. See the picture for reference.
Once you're happy, right click on any of the highlighted cues, and select Copy cue.
Now go to your new cuelist, and right click on the current first cue, and click Paste cue.
You'll see a prompt on your screen that asks about timecode. You want to click Enable. If you don't enable timecode here, you'll have to go back to the cuelist properties and go to Timing > Timecode and enable it.
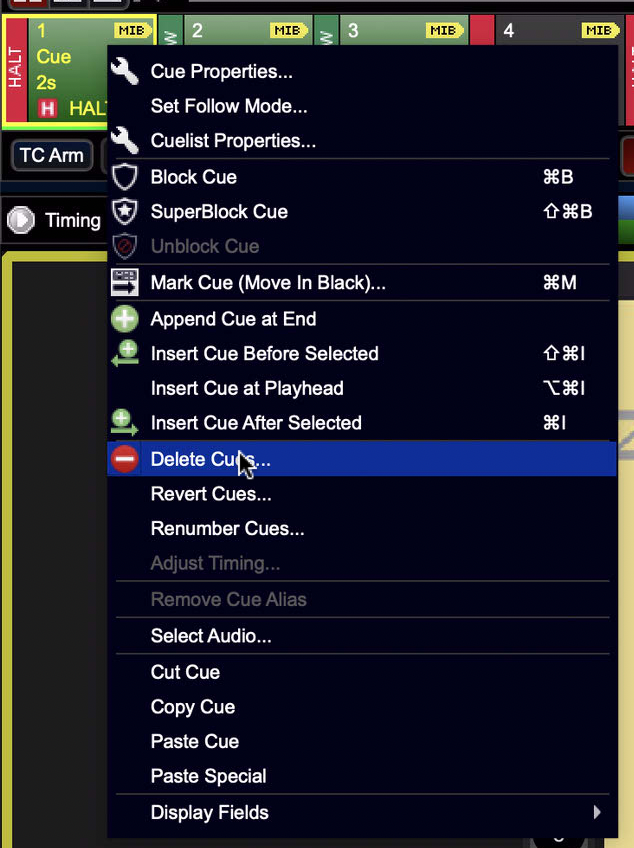
Next, you'll need to delete the blank first cue. You can do that by (staying in Q-View) and right clicking, selecting Delete cue, and confirming it.
Adding Songs
Now that we have added the initial part of the cuelist with the pre service and transition cues, we can add the songs.
The easiest way to do this is by going to Planning Center (on the website version), finding the song on the plan, clicking on it, and then in the right side bar, clicking on the name of the song (above the arrangement), so that it opens the song. What this will do is show you, at the bottom of the screen, the most recent time that the song was performed. If it was played for River Oaks Students or events not in the auditorium, there will obviously not be any lights programmed for it. So you want to look for the most recent Sunday morning the song was played.
UPDATE: There is a better way to get song information. Click here to view the new Service Viewer.
Once you do that, go back to the lighting console, and click on Open (to the right of the New button from earlier). This lets you open up a cuelist from previous weeks. Using the same format you used to create the new cuelist, search for the date the song was last played. M-DD-YYYY
Find it, select the cuelist, and open it.
Now do the same thing you did to select the pre service cues from earlier. Go to Q-View, select the first cue of the song, and the last cue.
IF the song has a follow cue at the end, sometimes you may want to copy it, since it likely has some useful parts of it that'll undo some changes it made to the pixel lighting.

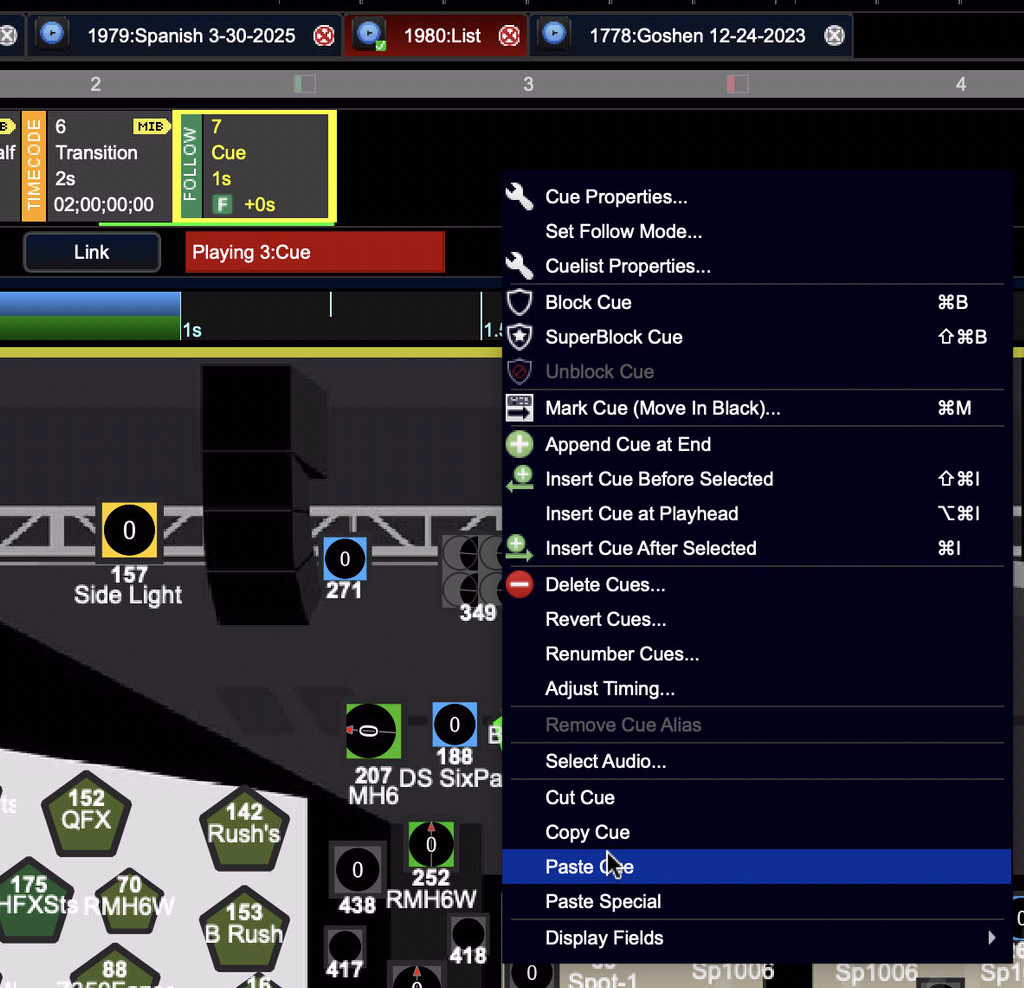
In the scenario pictured above, you'll see that there is a welcome cue and another follow cue after that. I have chosen to copy the first cue of the song through the first transition cue before the welcome (Since I don't want the welcome).
Now, go back to your new cuelist, and while staying in Q-View, click on the last cue you have, and then right click on it, paste in the cues you copied.
That's it for adding a song.
Adding Welcome/Message Cues
These parts are out of scope of part 1, but will be covered later on in this guide. For now, you should copy a welcome or message cue from a previous week.
Note, when I say message cue, I mean the entire 4-5 cues the message is involved in. Everything from the bumper/transition to the very last follow cue after the prayer.
Remember, you can click the Previous / Next buttons at the bottom of the screen to progress.