Part 3: Timecode
River Oaks Church - Updated April 2025
Goals / Scope
This section will show you how to set timecode cue times.
There are two types of timecode programming (from what I typically do).
- Live Tracking
- Re-Tracking
Live Tracking
Live tracking is the "standard" way to "track" (or add timecode to) cues. Essentially what this entails is that once the timecode mode is active, you will press the next button on the console at the exact time you want a cue to sequence.
This works best when there is a click track playing, so that you can get exact timings of cues dialed in.
Vista has a feature called Learn Timing. This is the tool we will be using. If the window isn't open, go to the menu bar at the top, click on Tools > Learn Timing.
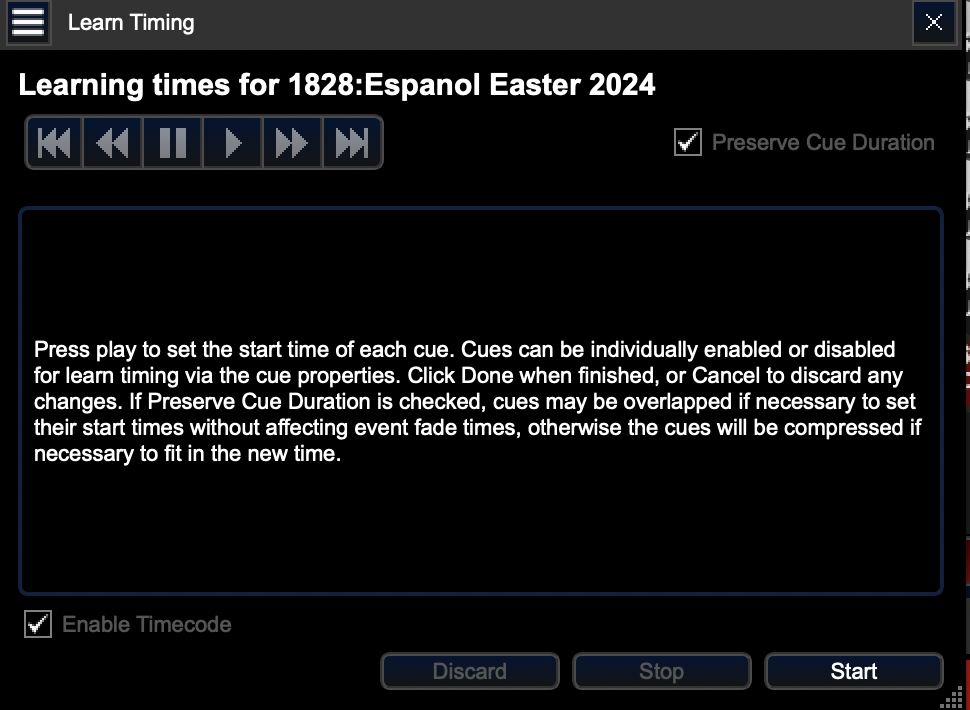
Initially, the window will look like this. You'll need to click th start button in the bottom right of it to continue. Once you click that button, you'll see a discard and stop button become available for use. Those will come in handy later for two use cases: 1. Discard: You mess up on tracking, and want to discard what you did 2. Stop: You are done tracking the timecode
After you click start, it's ready to record timecode as soon as it starts playing. One thing to note is that you do no want to track timecode for a follow cue. If you are in the process of tracking timecode, you should only advance your cues for halt (or existing timecode) cues. Doing it for the follow cue changes how long it waits to advance after the previous cue.
When tracking timecode, you need to hit the cue exactly when you want it to play. No earlier, and no later. There is a very minimal time between clicking the button and it actually recording the time.
Re-Tracking
Re-Tracking (not a formal term I've heard in the lighting world) is adjusting or retiming existing timecode that's in your cuelist. This is a quick and easy way to move cue timecodes around while: 1. Keeping the same arrangement (in terms of song arrangement) 2. Keeping the same spacing between cues
One scenario when re-tracking does not work is when the BPM of a song has changed since last time the song was used. In this case, you will need to live track the whole song again.
With that being said, let me explain how the Adjust Timing feature works.
Basically, once you have a new start time to your first cue (this can be obtained via the other live tracking method), you insert that into the Adjust Timing feature, and Vista calculates the distance between the new and old time, and automatically adjusts all cues to match that new start time. It saves so much time. (literally :)
When you are ready to offset all cues, select a range of cues you want to offset. This is done most easily in Q-View mode. Go into Q-View mode, click on your first cue, hold down shift, and click on the last cue. Let go of shift, right click on any cue, and click on Adjust Timing.
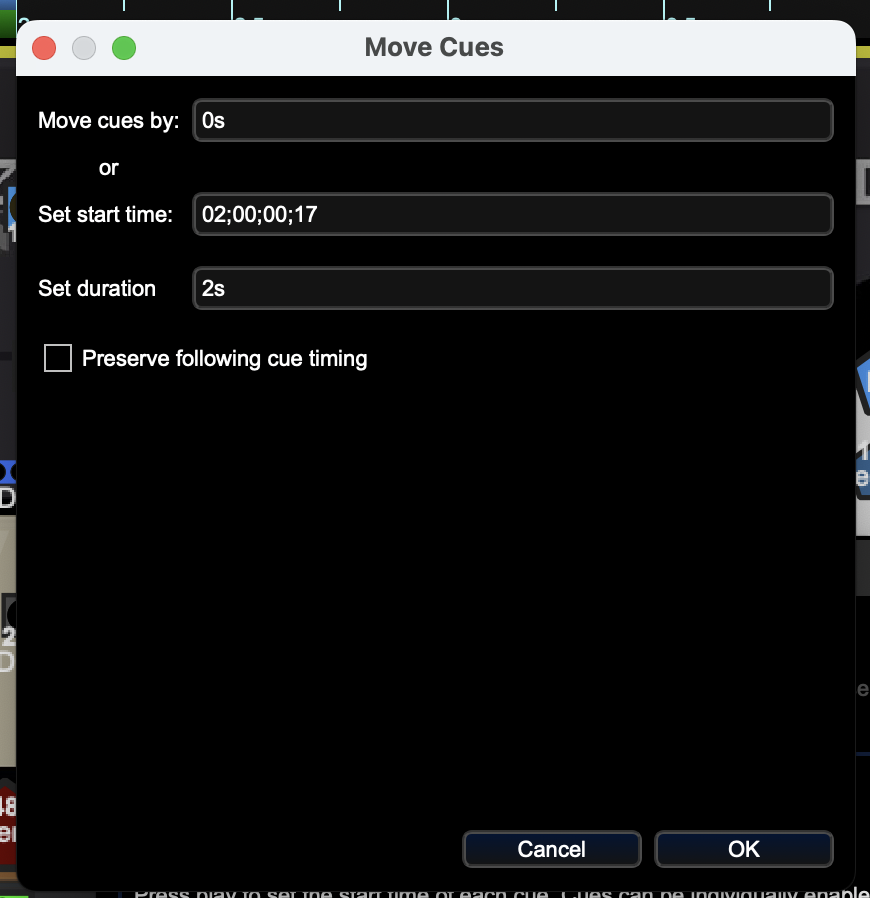
You'll want to make sure the box is checked to "Preserve following cue timing".
Then, paste in your start time into the Set start time field.
Click Ok, then you're done!