Part 2: Basic Programming
River Oaks Church - Updated May 2025
Goals / Scope
This guide will walk you through how to program basic pre service, welcome, and message cues.
Programmer
In the middle of your screen, you will see a layout that resembles the stage. Each fixture is laid out on the background relative to where it is in the room, except for pretty much all the fixtures in the bottom half of the screen.
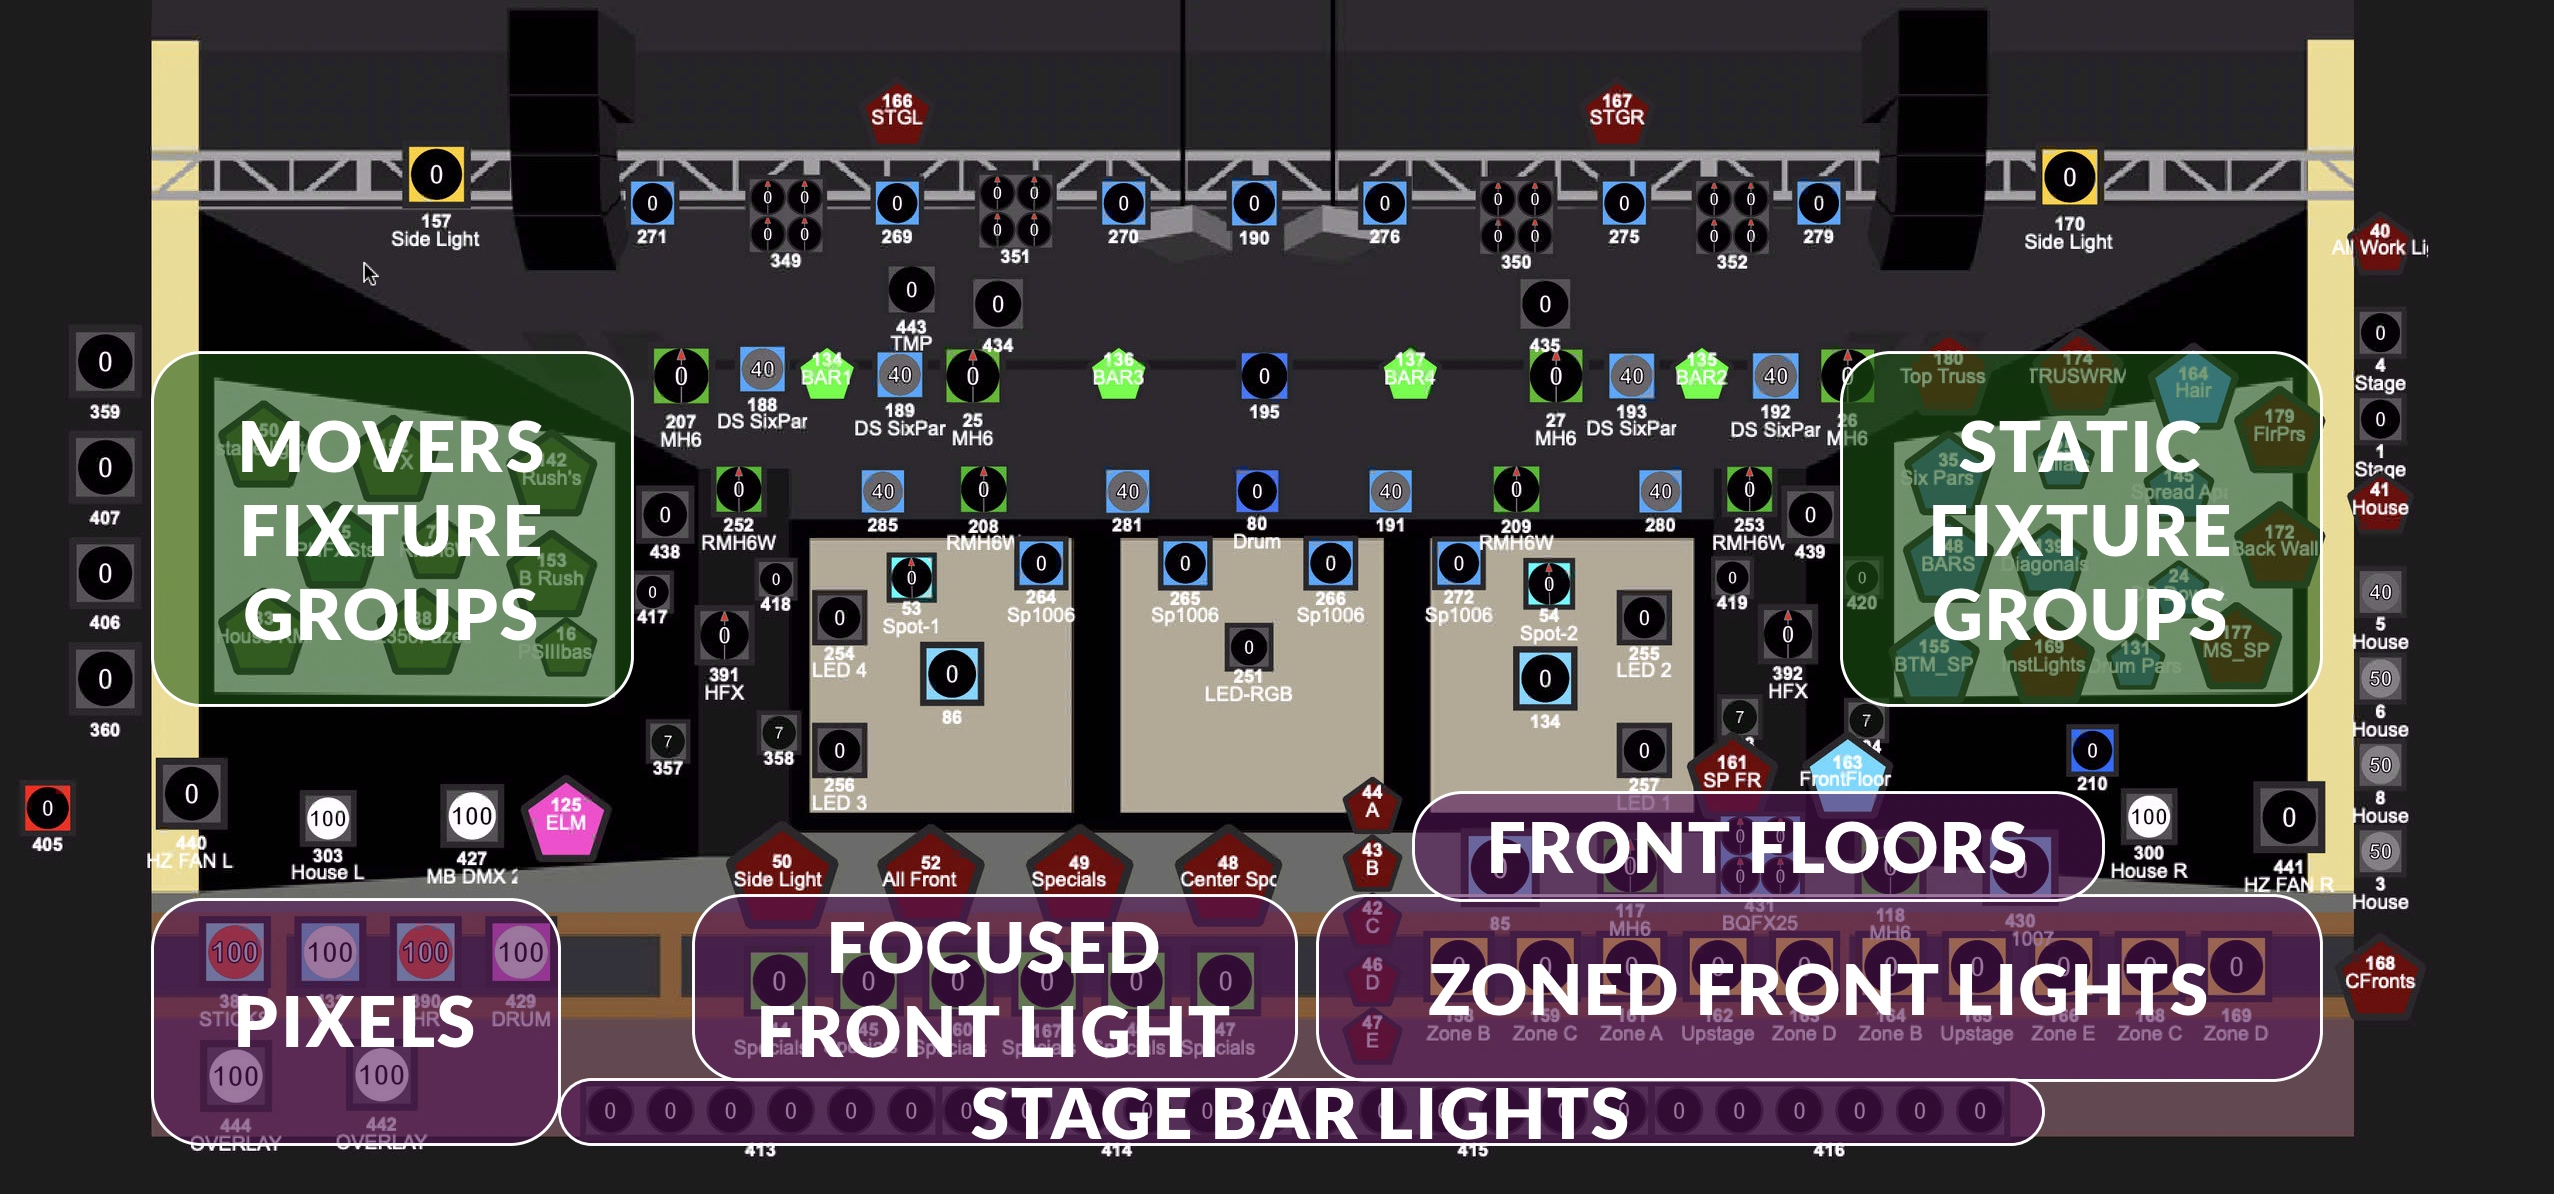
The highlighted fixtures that in the photo are not be laid out intuitively.
The green highlighted areas cover up fixture groups. The fixture groups are an easy way to select multiple fixtures at the same time.
To select a fixture and change its properties, simply click on it. You'll see a yellow border around it, and that will signify the fixture being selected. To select multiple, either click and drag, or click one at a time. Once you adjust a fixture property, you cannot add to your fixture selection. The software will automatically assume you are making a new selection.
Presets
In the bottom left of the screen, you can see presets that are created.
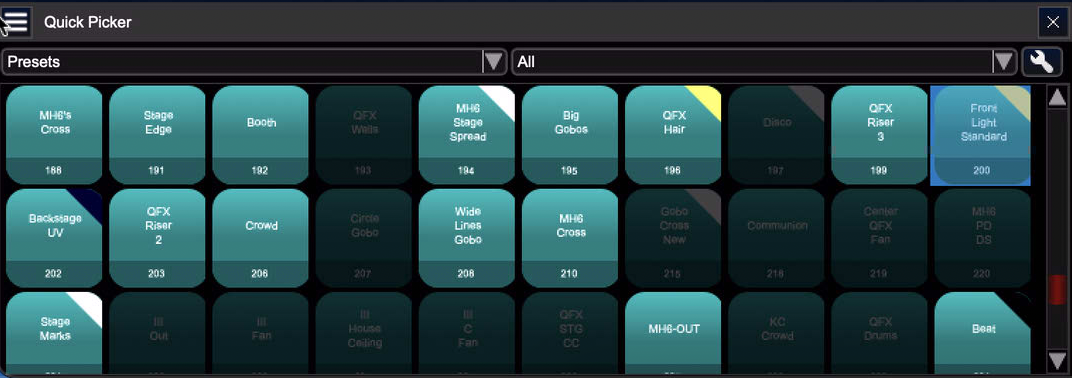
Typically the presets I regularly use are:
- Warm White
- Cool White
- Front Light Standard (A look I use for welcome/message/teaching/announcement type cues)
- QFX Hair
There are a lot of other presets I use, but the ones listed above are the most common.
Welcome Cue
One way to make a welcome cue is to (without any fixtures selected) select the "Front Light Standard" preset, and then change the house light brightness to about 30%. One general rule of thumb is that I typically run the very first front light set about 10% darker than everything else.
Message Cue
Programming wise, message cues are pretty "spiced up", and have a lot of extra lights on compared to what I do for a welcome cue. That being said, at the base of a message cue, I still have the usual "Front Light Standard" preset. House lights are also 40% in the middle rows, and 30% on the very front and very back.
Programming Notes
The message cues I design all match the theme of the sermon series very closely. Similarly, so do the announcement and welcome cues. Except instead of matching the sermon series, they match the song that comes after it (or before it in the case of the announcement cues)
Programming Fixture Properties
The whole point of "programming" is to set or adjust the properties of a fixture.
Vocabulary Terms
Let me define some terms:
-
Fixture: A singular light on the stage or in the house
-
House: The room
-
Stage: The stage inside of the room
-
-
DMX: The protocol used to transmit from a console (and receive on a fixture) data to tell it what to do
-
Channel: 1 of 512 DMX properties on a Universe that can have a value from 0-255.
- Property: A property of a fixture such as intensity/dimmer usually is on one channel, but sometimes can span across multiple channels. For example,
DimmerandDimmer Fine. Some fancier lights have it, and basically the first "Dimmer" channel is to set the "rough" brightness, and the "Fine" channel is for, well, fine adjustments. This is commonly seen on pan/tilt channels for the fixture to rotate across the x and y axis.
- Property: A property of a fixture such as intensity/dimmer usually is on one channel, but sometimes can span across multiple channels. For example,
-
Universe: A "grouping" of 512 DMX channels. One 3-pin DMX cable can carry a single unvierse at a time. Similarly, a standard light can only receive one universe at a time. The light itself chooses what channels to listen for.
-
sACN and Art-Net: These are some common protocols for transmitting/receiving DMX data over a network. I typically use sACN just since it's more widely accepted and has lots of options to fine tune it, but Art-Net is perfectly acceptable as well, and is really easy to create applications that listen for Art-Net data.
-
Now that we have gotten that out of the way, let's continue with how to adjust fixture properties.
Adjusting Properties
In the fixture chooser in the middle of the screen, select a fixture. You will see the right column of the screen light up, and allow you to make some changes.

The tab is called "Features", and it basically allows for you to adjust all the available parameters of a fixture.
Under the features tab, you'll see sub tabs for the following parameters:
-
All (Summary of all parameters)
-
Intensity
-
Position
-
Color
-
Frost
-
Prism
-
Custom
The tabs are exactly as they sound. The custom tab, however, includes all available parameters. There may be parameters (like haze %, fan speed, etc) that do not show up under the other various tabs, and can only be found in the custom tab.
Cue Tracking
By default on Vista, the cues have a "non blocking" style of programming, where once you make a change to a parameter, it will stay the same throughout the rest of the cues unless you override it later on in your cues.
This is also known as tracking. And what it means for programming is that you need to be cautious when changing parameters after having songs programmed. One strategy I use to combat this at the beginning of songs, I will reset the parameters of lights back to where I want them to be. Although it may seem annoying that most cues are "non blocking", it's really useful when you get new lights added to the showfile, since the parameters will stay throughout the whole cuelist, unless you modify them.
In part 3, we will cover timecode tracking. Similar name, but a different purpose. More info on programming will come later!